 Go Back to My "Home Page"
Or
Back to My "Projects Page"
Go Back to My "Home Page"
Or
Back to My "Projects Page"
Origonally Created: Mar 16 2002. Latest Revision, Feb 24, 2015Warning: I Do Not Recommend this project for the "Beginner", It definately Requires Good Soldering Skills and at least a basic working knowledge of electronics is Needed.
However, Occassionally I have some Pre-Assembled, Calibrated and Tested PCB's. Usually there is Little or no additional charge for these Pre-Assembled Boards, But they still require you to connect up the Controls, Meter, Piezo, etc and put it into a suitable case. But this might help some Less Experienced Persons.
EFFECTIVE AUG 1, 2010: I no longer supply Schematics or other info, Unless you buy the parts from me. And I Do NOT give Any help to persons that did Not Buy the parts from me. In the past Too many persons made Substitutions, poor quality PCB's or other Errors, than expect me to solve there mistakes.
**A Kit of parts Is Available from me. And other than the PCB and coils, most parts are supplied at my Landed Cost. When Purchasing this detector Kit from me, I will also send you a 8.5" X 14" Printed Schematic, as well as a 4" x 6" color Overlay Picture.
Email Me for the Current Prices. ********************************************
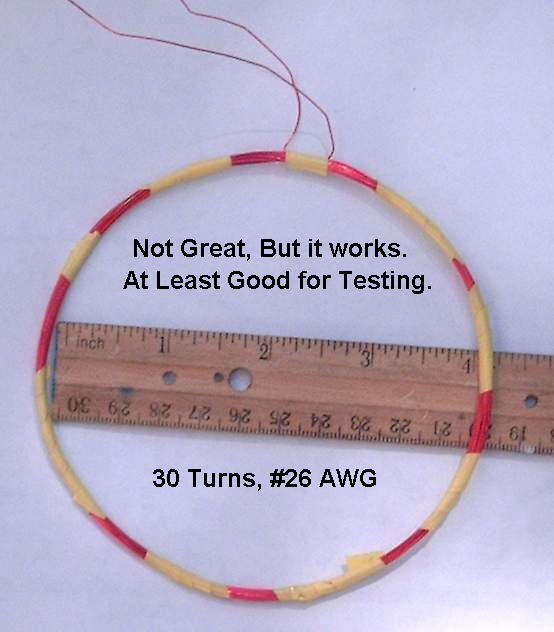
This unit is Extremely Stable and their are Three possible Coil configurations, as listed here.
1) First configuration is just a single coil. Best for most applications! 2) Second is a dual coil, with better noise and ground effects cancellation. 3) Third is a dual coil, one for transmit and one for recieve.
NOTE: Before Testing the Completed Unit Wash the board to Remove All Flux Residue. IT WILL NOT WORK CORRECTLY IF YOU DON'T!
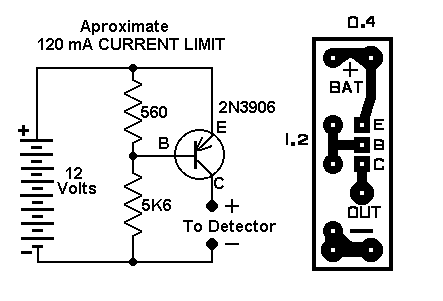
I Also Recommend to use a Current Regulated Power Supply Just for "INITIAL TESTING" testing of this PCB. (Less than 200 Ma. is quite satisfactory) And if you included the 100/1000Hz Switch on yours, Make Sure your on the "100Hz" Setting.
Excessive Current, generating heat, will Distroy the REG1117A. Failing a Regulated Supply, a 100 Watt/110 volt standard light bulb can be placed in series with the positive battery lead.
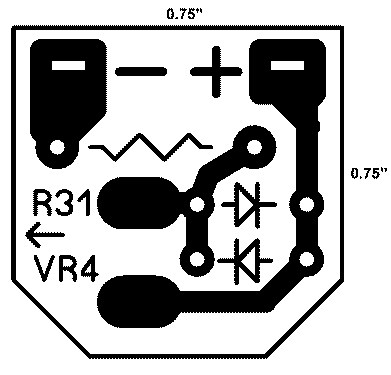
NOW I can supply this Simple Circuit to limit this Current for Initial Testing, thus preventing any damage to the parts.
Good Soldering is a Must! NOTE: It is Important to use a Good Soldering Iron, Rated at about 25 Watts and having a Small Clean Tip.NOTE: However, If you build this PI project and have problems, I will offer you as much assistance as possible in e-mails, Even to the extent of Free Repairs, Not Including Postage Charges, and Assuming the actual Circuit board has Not been Damaged beyond Repair.
A Note about the Battery: I Do Not recommend using a Lithium Ion Battery on this detector, because most are rated at 10.8 to 12.6 Volts. When the battery goes below 11.5 Volts the detector will Lose Proper Voltage Regulation And become Unstable.
I do Recommend using 10 NiMh Batteries will provide Better Power, because they Maintain a Constant 12 Volt supply or use a 12 Volt Sealed Lead Acid Battery. (Gell Cell)
Note: This Detector was Not designed as a Gold Detector. However It Will detect larger Gold Nuggets with a suitable coil. But if your expecting to detect Tiny Nuggets or Flakes of Gold, FORGET IT!
Additionally, The only metal that I have found that my metal detector will NOT DETECT is some Better Qualities of "Stainless Steel".
Here is a Much Appreciated explaination from one of my readers: Well the reason why you can't detect it is because the conductivity of Stainless is very low. This is true for all pulse induction metal detectors. Because of the low conductivity, the eddy currents have disipated by the time the pulse delay has ended and you begin to sample the signal. The lower the conductivity of the metal, the faster the eddy currents disipate. If I remember right the conductivity of copper is 100, the conductivity of good Quality stainless steel is about 1.3 or so. The conductivity of silver is 108 so its the best on range. Gold is in the 60 to 80 range depending on the alloy. The longer the pulse delay on your detector is, the less likely you will be able to pick up lower conductive metals. Hope this helps. Good luck, Charles A Note from me: Well I was aware of the Delay times, I didn't realize that stainless was so low in conductivity. Thanks Charles!
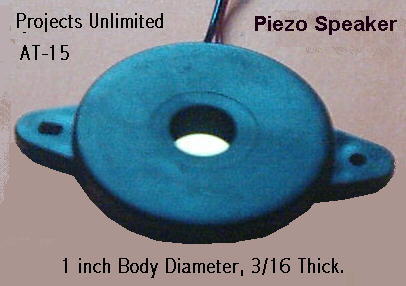
I can supply this "Piezo Transducer" that works Excellent on this unit.
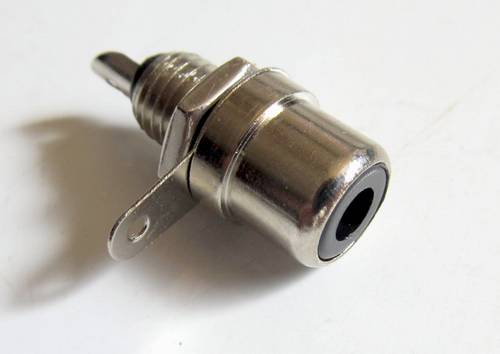
I can now supply these "Female RCA Jacks" that work good if you use a 3 ft Audio cable with the RCA Plugs on each end for connecting the Coil to the PCB. Sorry, I do not supply these cables, but they are commonly available.
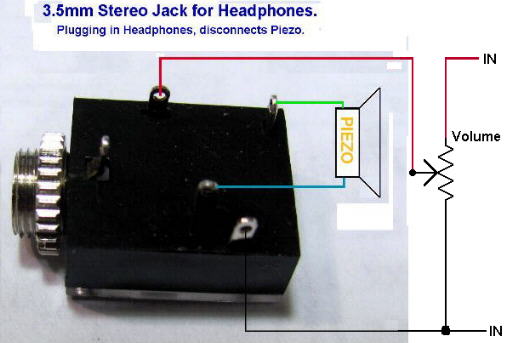
I can also Supply this 3.5mm, Stereo Headphone Jack.
It has a Built in Switch to turn off the Piezo, When the headset is plugged in.
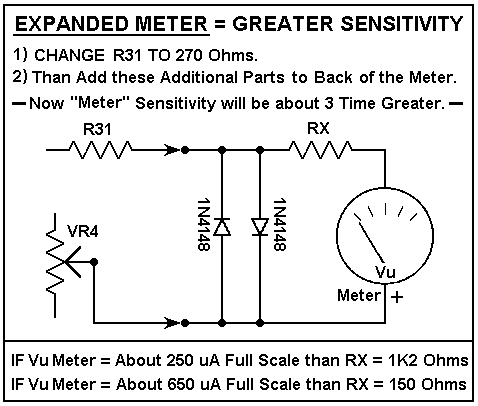
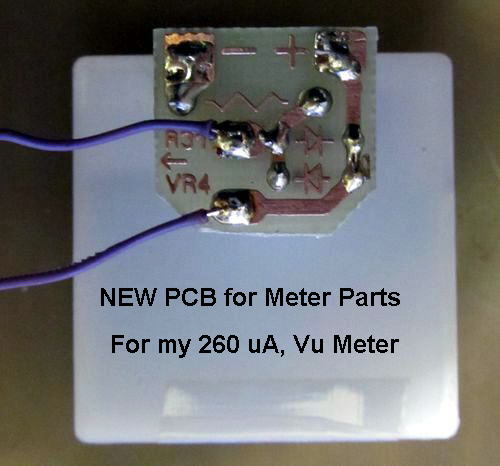
I can Now Supply this "GOOD" Vu Meter
"To Make the Meter "More Sensitive", Make these Changes"
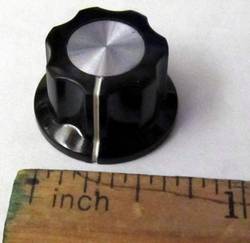
The Pots I supply have Aluminum Shafts. So if wanted they can be easily cut to a more suitable length with a Hack Saw to fit these "New Knobs" I have acquired at a GOOD PRICE."
"Click on the Titles below to open them"
****************************************
If You Have PROBLEMS when you build this Unit, Don't Overlook Anything!
At least for testing purposes.
Built by Other Persons. It would be Greatly Appreciated to recieve Feedback from ALL persons building this Detector. As of May 2010, Well over 2000 of this detector have been built, and From Replies recieved no one has been unsatisified with it.
And Always keep checking both the hole and the earth you dug out to make sure you can find the object.
IMPORTANT NOTE
The only claims I will make as to the sensitivity of this Detector is: The one I made for myself does detect a Canadian Quarter (made of Nickel) at 10 Inches in Air and at 10 inches in the soil in my yard. Also an American Quarter (Zinc I Believe) at a distance of 10 inches in Air
Additionally, If built correctly: This Metal detector should detect a "Pop Can" at an "Absolute Minimum Distance" of 15 Inches. AND it could get to 25 Inches or More, depending on the Coil & Meter you use.
However there are too many Variables in Coil Construction, as well as materials, shapes, sizes and soil conditions to try to predict exactially what your detector will do under various conditions.
ADDITIONALLY, Remember This:
THE MOST IMPORTANT THING WITH ANY METAL DETECTOR, IS THE OPERATORS "ABILITIES", "SKILLS" AND "PATIENTS" in using it PROPERLY!
All Imformation in this Article is "Copyright protected".
Chemelec
*Copyright © 2002 & 2014*
